You’ve got the character model, the scene is lit, and the rendering engine is ready to roll. But there’s one problem: your character can’t move. No expressions. No gestures. Just a static model frozen in time.
This is where 3D rigging for animation comes in. The process of rigging is important for a character’s animation. It allows for your character’s movements to be playful rather than robotic. It allows your character to jump, blink, or nod. It also serves to connect concept art to fluid animation coherence.
The 3D animation market was valued at over 16 billion USD in 2021. This value is only expected to skyrocket to an estimate 47 billion USD in 2030, growing at a rate of CAGR of 12.5% during the stated time period.
With the current advancements in AI and their practical applications in animation, this guide serves as a real-world walkthrough for the workings of 3D rigging and how one can maximize their animation workflows in 2025.


What Is 3D Rigging for Animation?
3D rigging allows for a static character model to be transformed into a moving character with the addition of joints, muscles, and controls similar to a digital puppet skeleton. Once your 3D rig is completed, the character can be put through a comprehensive animation with dialogues and emotions.
You can take this a step further, as character animation is not limited to walking and talking; it can also include nuanced movements such as facial twitches or finger curls, as long as a customizable responsive system for a character’s movements is in place.
Why Rigging Matters More Than Ever in 2025
The bar set for animated content, such as films, games, VR, and AR, has risen quite drastically. Viewers look for fluid and lifelike animated characters, and studios want more organized workflows. Because of this, rigging has become one of the most important technical stages in the 3D production pipeline.
Rigging as a discipline is changing rapidly due to AI and machine learning. With the right tools, processes that previously took days can now be done in hours. This is precisely the reason why learning the basics of 3D rigging will give you a competitive edge in the industry.

Core Components of 3D Rigging
To fully understand the concepts of 3D rigging, let’s break it down into its key building blocks:
1. The Skeleton (Bones & Joints)
This is your rig’s foundation. Skeletons in anatomy 3D modeling form the basis of the rig, with the structure of bones joined by joints. The joints dictate how and in what angles your model can flex and rotate.
- Bones control large-scale movements (arms, legs, torso).
- Joints dictate where those movements pivot (elbows, knees, spine).
- Constraints are added to control how far or in what way joints can move.
2. The Mesh (Skin)
This is the visible surface of your character, usually made up of a polygon mesh. It wraps over the skeleton and deforms when the bones move.
To achieve a natural illusion for the movement, the skeletal mesh’s vertices are assigned weights. Each vertex can be assigned a value that measures the amount of influence nearby bones have on it.
3. Weight Painting
This is where precision comes in. Weight painting lets you paint influence values onto your mesh, ensuring smooth and believable deformation during motion.
Done wrong, weight painting can lead to warped limbs and unrealistic stretching. Done right, it’s the secret to making characters feel alive.

The Process of 3D Rigging: Step by Step
Here’s how most animation studios approach the rigging process, from model to fully animatable asset:
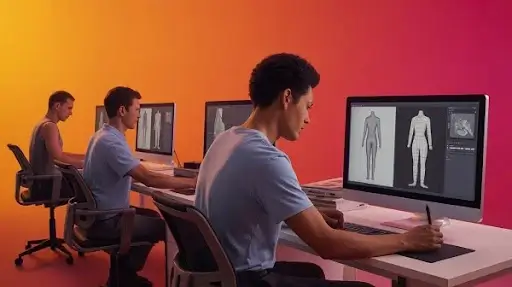
Step 1: Build or Import Your 3D Model
Before anything else, you need a static model to rig. This could be a human, animal, robot, or even an abstract object.
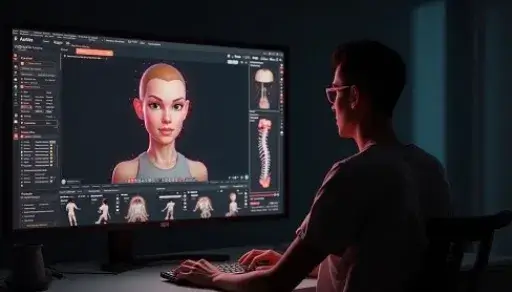
Step 2: Add a Skeleton
Using rigging tools in your 3D software (like Blender or Maya), you create a joint chain that matches your model’s anatomy.
For humanoid characters, this usually includes:
- Spine
- Neck and head
- Arms and legs
- Hands and feet
- Fingers and facial joints
Step 3: Skinning the Mesh
Once your bones are placed, it’s time to bind the skeleton to the mesh. This is called skinning. It links the bones to the surface geometry so the mesh moves with the skeleton.
Step 4: Weight Painting
This is the refining stage. You adjust how much each bone influences nearby mesh vertices. This is especially important around joints like the shoulders and knees.
Step 5: Add Controls (Rig UI)
Now it’s time to make the rig user-friendly. Animators don’t want to move bones manually. That’s where controllers come in, custom shapes or sliders that simplify character movement.
These can include:
- IK (inverse kinematics) handles
- FK (forward kinematics) controls
- Facial rig sliders
- Eye-target controllers
Step 6: Test the Rig
Before handing it off to animators, you need to test your rig. Run it through basic movements: walk, jump, crouch. Watch for weird deformations or delays in response.
The Advantages of 3D Rigging
A strong rig can make or break a production pipeline. Here’s why studios invest so much time into high-quality rigs:
- Time-Saving: Once rigged, a character can be reused in hundreds of scenes.
- Flexibility: Rigs can be adjusted or updated as animation needs evolve.
- Realism: Accurate skinning and constraints allow for human-like motion.
- Control: Custom controls mean animators can focus on performance, not mechanics.
These are just a few advantages of 3D rigging that help transform flat digital characters into expressive, cinematic performances.
Advanced 3D Rigging Techniques
As rigging tools evolve, so do the methods used by top studios and creators. Some advanced techniques to know:
- Modular Rigging: Building rigs as reusable modules (spines, limbs) to speed up production.
- Facial Blend Shapes + Joint-based Rigs: Combining techniques to allow for micro-expressions and lip-syncing.
- Stretchy IK/FK Switching: Allowing bones to stretch for exaggerated motion, useful in stylized animation.
- Space Switching: Enabling controls to dynamically switch between parent objects for easier scene handling.
- Muscle Systems: Adding deformers that simulate muscle bulges and skin sliding for realism.
Achieving high-end cinematic quality demands smooth transitions between aspects of control and artistic techniques. These advanced 3D rigging techniques enable a seamless blend of artistry and technology.

AI and Machine Learning in 3D Rigging
The most exciting shift in recent years is the rise of AI and machine learning in 3D rigging.
Instead of spending hours creating joints and tweaking weights, new AI-powered tools can:
- Autogenerate skeletons from meshes
- Suggest joint placements
- Automatically paint weights
- Clean up rig errors
- Map motion capture data with little manual effort
The biggest win? AI speeds up the rigging process without compromising quality, something that was impossible just a few years ago.
Some other interfaces automate the simulation of how the skin and muscles will interact with each other as they move, with real-world data allowing for muscle memory with skin movement, making character movement ultra-realistic with very minimal manual tweaks.
Examples of 3D Rigging in Action
Here’s where it gets real. These are some standout use cases showing how powerful rigging is when done right:
- Films like “Avatar” and “Monsters Inc.” used highly advanced rigs to create believable characters from performance capture.
- VR and AR games use rigged avatars to respond to user movements in real time.
- Educational simulations rig human organs or mechanical systems to help students understand how they function.
- Marketing mascots, like animated brand characters, are rigged for smooth, consistent movement across ad campaigns.
These examples of 3D rigging prove just how far this technique stretches beyond movies and games. Rigging now touches everything from healthcare to e-commerce.
Top Rigging Software Tools
The right software selection can either enhance or hinder your 3D rigging workflow. While most tools attempt to offer rigging capabilities, very few go the extra mile to provide the control, flexibility, and efficiency that riggers and animators require. Below are some of the top rigging software programs that professionals trust to use and why they are still relevant in 2025.
Autodesk Maya
Maya is arguably the most used software in professional animation studios. It has powerful rigging capabilities and is built to handle production-grade pipelines that require sophisticated rig and blend shape, as well as constraint management at scale.
Why riggers love it:
- Advanced skeleton and joint systems
- Non-linear deformers
- Powerful scripting with MEL and Python
- Custom rig UI options for animators
If you’re working in film, AAA games, or broadcast animation, Maya is still one of the safest and most robust choices around.
Blender
Blender has become a go-to for indie creators and smaller studios. It’s free, open-source, and surprisingly powerful. It comes packed with a full rigging suite, including weight painting, bone layers, constraints, and driver-based systems.
Notable rigging perks:
- Auto weight painting
- IK/FK switching
- Shape keys and facial rigs
- Python-based rig automation
What makes Blender stand out is its balance of flexibility and price; it gives you studio-level rigging tools without the cost.
Cinema 4D
Cinema 4D is often favored for motion graphics and stylized animation. It has great rigging templates, built-in dynamics, and integrations with tools like After Effects.
Key rigging strengths:
- Character Object for quick rigs
- Toon rigging for stylized characters
- Visual weighting and paint tools
- Fast viewport performance for testing rigs
How AI Is Changing the Rigging Process
Previously, we touched on the use of AI and machine learning in 3D rigging. Now, let us look at the impact of this transition on production.
Now, artists have access to AI-based tools that analyze mesh geometry and build skeletons automatically. These tools are a great asset for quickly creating prototypes or for use in large-scale projects that require many characters.
Common AI-powered rigging features:
- Auto-detection of joint placements based on mesh topology
- Instant weight painting suggestions for limbs and facial areas
- Pose prediction using motion data to test deformation early
- Error detection, some tools flag rigging mistakes before you animate
In practical terms, this means less technical guesswork and more creative time. You’re no longer stuck correcting mesh deformation frame by frame or re-rigging a poorly built skeleton.
Popular tools using AI in rigging:
- Cascadeur: AI-assisted posing and physics-based motion refinement
- Radical Motion: Auto motion capture from 2D video inputs
- DeepMotion: AI motion conversion tools for rigged 3D characters
This shift saves weeks of manual effort and allows studios to scale production without scaling headcount.
The Rise of Rigging Specialists
With rigging becoming both more technical and creative, it’s also created a new niche in the industry: digital animation or rigging specialists.
These professionals don’t just understand skeletons, they know how to design rigs that animators actually want to use. That means:
- Efficient control schemes
- Clean deformation
- Support for stylized exaggeration or hyper-realistic anatomy
Rigging specialists are increasingly sought to develop character libraries, ensure rigging uniformity across productions, and incorporate AI capabilities into standard workflows.
As an animator, if you are getting frustrated by poorly constructed rigs, then hiring or training yourself to become a rigging specialist is definitely a wise decision.
When You Need Advanced 3D Rigging
You might not always need a complicated rig. But here’s when it’s worth going the extra mile:
You’ll want advanced rigging if:
- Your character needs an extreme range of motion (e.g., backflips, acrobatics)
- You’re animating dialogue-heavy scenes with facial expressions
- Your production uses motion capture
- You’re aiming for realistic anatomy and muscle behavior
- Your team needs custom rig controls for efficiency
- You plan to reuse the rig across multiple projects
Rigging pays off downstream as long as you invest properly upfront, regardless of the circumstances. Solid rigging will always save you from undertaking numerous corrections later.
Frequently Asked Questions
In the following sections, I outline the most common issues both a creative and a client usually ask regarding rigging, and clear solutions that trim the clutter are provided.
What’s the difference between forward and inverse kinematics?
Moving each joint one at a time from the core out is defined as forward kinematics. Inverse kinematics is the opposite; you can move a joint, and all the joints before it adjust automatically.
How does AI help in 3D character rigging?
AI tools automate skeleton generation, weight painting, and error checking. They also enhance realism by simulating muscle and skin motion.
What’s the best software for 3D rigging?
Blender is suitable for independent and freelance designers. Cinema 4D is excellent for stylized projects and works well with motion graphic tools. Most large studios use Autodesk Maya.
Can I learn rigging without coding?
Yes. Most 3D software offers visual tools and templates. But basic scripting can unlock more control if you want to go deeper.
What are the advantages of 3D rigging for animation workflows?
Control, speed, realism, and reusability. Economic efficiency in animation is a result of having a well-rigged motion character.
Where can I find a rigging specialist to work on my project?
Custom studio-grade works can be obtained by partnering with a studio like Prolific Studio, one of the best animation studios in Burbank. Freelance work sites like Upwork or Fiverr also allow you to hire digital rigging or animation specialists.
Final Words
You can’t afford to cut corners on rigging. In fact, rigging is the reason your characters feel real. AI-driven tools and systems have reduced the barriers to quality rigging, and creative expectations have risen. The core of rigging is to have motion be believable and to allow animation to be usable.
If you’re looking to bring your animated content to life with realism and efficiency, it’s time to prioritize 3D rigging for animation. Whether you’re building a game, a commercial, or a short film, your characters are only as good as the rig beneath them.
Need help with your rigging or animation workflow?
Get in touch with Prolific Studio today. Our experienced riggers and animators will help you create production-ready characters with motion that sells.
Related articles: