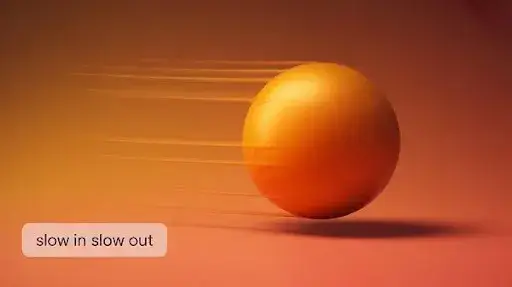
Some animated scenes grab you even before you realize why. A character raises a hand, a ball drops, a door swings open, and something about the timing just feels right. That sensation doesn’t come from flashy effects or high-budget renders. It comes from a simple but powerful principle: slow in and slow out in animation.
Studios that ignore it end up with stiff movement and lifeless pacing. Teams that use it well make characters feel grounded and believable, even in exaggerated stories. Animation fans may not know the technical terms, but they instantly notice the difference when motion lacks a natural buildup or slowdown.
This principle has been shaping animation timing and animation spacing long before CGI existed. It guided traditional hand-drawn animators, and it still matters to any modern 3D animation company that wants its work to look intentional instead of mechanical.
Slow in and slow out isn’t a theory sitting in a textbook. It’s baked into every expression, every gesture, every camera move that feels smooth. Understanding it is one thing. Applying it with purpose is what separates amateur animation from sequences that feel alive.
What Is Slow In and Slow Out in Animation?
When people ask what is slow in and slow out in animation, the answer is pretty direct: it’s the idea that motion doesn’t start or stop at full speed. The movement ramps up and eases out. In traditional terms, it’s also called ease-in and ease-out.
A character’s arm doesn’t shoot forward instantly. A falling object doesn’t hit the ground at a constant pace from the first frame. Real things respond to acceleration and deceleration in motion, which come from physics in animation, like inertia and momentum.
Animators mimic that by using more in-between frames at the beginning and end of a movement, with fewer in the middle.
Without slow in and slow out, everything looks like it’s animated on autopilot. Movements snap, pause, and break the illusion of weight. Once slow in and out gets added, motion gains softness, buildup, and intention.
This principle isn’t just tradition. It directly affects animation realism, animation smoothness, and how characters communicate through motion.
Why Slow In and Slow Out Feels Real
Fast jumps between poses might save time, but they ruin the sense of life. When an object changes direction without easing, it clashes with what people expect from the physical world. The viewer may not say “this lacks overlapping motion”, they’ll just feel the stiffness.
Here’s what slow in and slow out adds to animation:
1. Natural Motion in Animation
Every movement in the real world involves acceleration/deceleration in motion. You don’t sprint the second your foot leaves the ground. You gather speed. An animation that ignores this loses credibility. Even stylized characters follow some basic physics in animation.
2. Animation Timing that Feels Intentional
Movement gains rhythm when an animator controls the start and finish. Slow transitions help direct the audience’s focus while keeping the pacing readable.
3. Character Animation Technique and Personality
The same action can feel totally different depending on how slow in and slow out are timed. A heavy robot, a jumpy squirrel, and a graceful dancer won’t ease into motion at the same rate. That’s how animation spacing and timing define personality.
4. Spacing Over Speed
Many new animators focus on frame count instead of spacing. But spacing, how far an object moves per frame, makes or breaks a scene. Small increments near the start and end sell the illusion of smooth acceleration and slowdown.
5. Support for Other Animation Principles
Slow in and slow out work with follow-through in animation and overlapping motion. For example, if a character stops walking, their clothing or hair may keep moving. Easing the main motion makes that follow-through feel natural instead of disconnected.
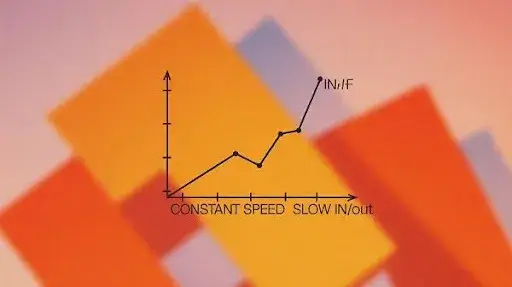
Difference Between Constant Speed and Slow In/Out
A key part of understanding how animators use ease-in and ease-out is spotting the gap between them and constant motion.
Constant speed animation:
- Same spacing per frame
- No buildup or fade-out
- Looks mechanical
- Breaks realism unless used intentionally for machinery or stylized movement
Slow in and slow out:
- Tight spacing near the start and end
- Wider spacing in the middle
- Matches real physics
- Gives the viewer time to register the action
The difference between constant speed and slow in/out becomes obvious when a character jumps, blinks, reacts, lands, or turns. Real motion has anticipation, momentum, and a fade. Constant speed robs all of that.
How Slow In and Slow Out Improves Realism
Even exaggerated animation styles rely on motion that sells weight and purpose. Here’s how slow in and slow out improves realism:
Adds Weight
Heavy objects require more frames to accelerate and then slow down. Light ones ease faster. Without easing, everything seems hollow and floaty.
Guides Attention
Smooth changes in speed help the eye track movement. Sudden shifts make scenes harder to read and follow.
Balances Exaggeration
Even in cartoony animation, easing keeps stretched motions from looking chaotic. It gives the audience an anchor.
Fixes Mechanical 3D Motion
Digital animations often look too rigid when interpolation is left untouched. Applying slow in & slow out to 3D animation through curves and timing adjustments gives control back to animators.
Easing Curves and Timing Tools
In hand-drawn animation, easing came from adding or removing in-between frames. Digital tools use easing curves and graph editors to do the same thing.
A few common easing methods include:
- Ease-in (slow start, fast finish)
- Ease-out (fast start, slow finish)
- Ease-in-out (slow, fast, slow)
Instead of straight lines on a timeline graph, animators shape curves to adjust the speed of motion over time. These curves affect animation timing, animation spacing, and how each movement breathes.
Even with tools handling interpolation, animators still set key poses with easing in mind. Curves only help if the body language and pose spacing already make sense.
Slow In and Slow Out Examples in Animation
Scenes that stay with viewers often use easing in ways people don’t consciously notice. Some common slow in and slow out examples in animation include:
Character Movement
Walk cycles, head turns, eye movement, and hand gestures all benefit from easing. A character who snaps into poses feels robotic. One who eases into them looks focused and alive.
Facial Expressions
Even a raised eyebrow uses micro-easing. If it appears instantly, the emotion looks fake. If it eases, it gains nuance.
Environment Interaction
Doors, curtains, props, and vehicles move better when eased. When they start and stop abruptly, the scene loses believability.
Physics-Based Motion
Anything that falls, bounces, swings, or rolls uses easing by default. Even a stylized bounce looks wrong without easing.
Camera Movement
Virtual cameras can feel disconnected from the action when animated at constant speed. Easing makes shots more immersive.
Studios like Pixar, DreamWorks, and top 3D animation companies apply it constantly, not as a special effect, but as the backbone of movement.
How to Use the Slow In and Slow Out Technique
People ask how to use slow in and slow out technique without making their scenes look dragged out. The answer lies in timing, not delay. Here’s how animators apply it in practice:
Start with Key Poses
Begin by locking down strong extremes. Slow in and out depends on having clear poses to transition between.
Add In-Between Frames with Purpose
More frames near the start and end create easing. Too many in the middle makes the motion stall.
Control Timing with Graphs
In 3D animation, easing curves replace physical spacing. Adjust keys on the timeline instead of letting linear interpolation take over.
Match Weight and Personality
Fast easing works for quick gestures. Slow easing suits objects with mass.
Blend with Follow-Through and Overlapping Motion
When combined, easing and follow-through in animation create a chain reaction effect that feels grounded.
Avoid Overuse
Easing every single motion in the same way leads to softness and a “floaty” result. Vary pace and weight.
Applying Slow In & Slow Out to 3D Animation
Modern pipelines rely heavily on software, but software defaults won’t deliver natural motion. Linear interpolation creates movement that jumps instantly from keyframe to keyframe. Animators refine that by working with easing curves.
For teams in a 3D animation company, here’s how slow in and slow out improves the result:
- Adjusts arcs in character animation technique
- Fixes stiffness in rigged models
- Supports mocap cleanup
- Enhances camera motion
- Keeps props and environment pieces from moving like machines
The gap between okay animation and believable animation often comes down to curve control and frame spacing.
The Purpose and Power of Slow In and Slow Out
You can explain easing with charts and keyframes all day, but its real magic shows up in how it feels. Animation isn’t just motion; it’s intent, emotion, and storytelling. And this principle quietly supports all of that.
Think about how people move in real life. Nobody whips their head around at full speed the second they decide to look sideways. Even the smallest actions, turning, reaching, blinking, start and end with a bit of buildup and a fade. Skip that in animation, and everything starts looking like it was keyframed by a malfunctioning robot.
Slow In and Slow Out does more than smooth out motion. It adds:
- Weight: You can tell the difference between a bowling ball and a soap bubble just from how they start and stop.
- Intent: A sneaky reach, an angry stomp, a hesitant glance, easing sells the motivation.
- Emotion: Mood shows up in movement. Easing controls how it reads.
- Believability: Even fantasy worlds need motion that feels grounded.
Now, let’s break down how easing changes depending on the type of movement.
Using Slow In and Slow Out Based on Motion Type
Every action can use easing, but not in the same way. The scale and purpose of the motion change how you apply it.
1. Small & Subtle Movements
Tiny motions don’t need big, dramatic easing. Just a few closer frames near the start and finish can make a blink or head turn feel human instead of stiff.
Quick note: If you overdo easing on small motions, characters start looking like they’re underwater or jet-lagged.
2. Big or Dramatic Actions
When something swings, jumps, or lunges, easing becomes way more visible. The buildup and slowdown tell the viewer how much force is behind the movement.
Tip: Keep the middle frames more spaced out so the action still has impact.
3. Mechanical or Robotic Motion
Even machines don’t instantly start and stop. A piston builds pressure. A door slides, then slows. If you skip easing altogether, the motion feels fake unless that’s the goal.
If you’re going for a robotic vibe? Keep the easing sharp and minimal, not absent.
4. Cartoony and Exaggerated Movements
Cartoons love stretching the principle instead of ignoring it. A character might slowly crouch before launching in a single frame, then land with a long drag of follow-through.
Just remember: Exaggeration still works best when it follows natural rhythm, not randomness.
Frequently Asked Questions
Is Slow In and Slow Out just for characters?
Nope. It works for anything that moves, props, UI elements, effects, vehicles, whatever.
Should it always be used?
In most cases, yes. The only time to skip it is when robotic or snappy motion is a deliberate style choice.
Is there a set number of frames to use?
No fixed rule. It depends on speed, intent, scale, and style. The goal is believable, not mathematically even.
Are easing curves in software enough?
They're a good starting point, but hand-tweaked spacing always wins, especially for emotional or story-driven shots.
What happens if I don’t use it at all?
Movements look plastic, floaty, mechanical, or jerky, even if the rest of the animation is well-rendered.
Final Words
Slow In and Slow Out is one of those principles that quietly holds everything together. It shapes how characters move, how weight is shown, how emotion reads, and how timing flows.
It affects everything from small facial twitches to full-body actions and even camera movement. When the frames cluster near the start and end of a motion, something clicks in the viewer’s mind; they accept the movement as intentional, not random.
Once you start paying attention to it, you’ll notice just how many great scenes depend on what happens before and after the main action. Mastering easing isn’t about making things slower; it’s about giving every motion a beginning, a journey, and an end.
Get in touch with Prolific Studio, one of the best animation studios in Santa Monica, and leverage high-quality animation services today.
Related Articles:


