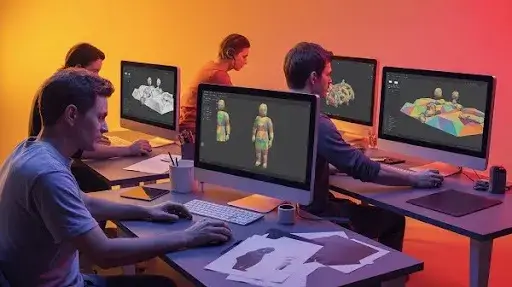
3D modeling is where raw imagination turns into something real. It’s how an idea that starts as a rough doodle or sketch ends up as a moving, lifelike digital model. Every ridge, corner, and bend has a purpose behind it. What seems like magic on-screen is actually the result of a carefully planned 3D modeling process, one that blends technical skill with artistic instinct.
At Prolific Studio, artists often say, “A good 3D model doesn’t just exist, it behaves.” That’s what separates expert 3D modeling services from casual attempts made for fun. The difference lies in control, patience, and precision.
This complete guide walks you through the 3D modeling process from concept to render. You’ll see how rough sketches become polished, production-ready assets and what decisions quietly make or break a model before it ever reaches the screen.
Understanding the 3D Modeling Process
To really get how 3D models are made, it helps to understand that the 3D modeling workflow isn’t just about shaping polygons. It’s an organized 3D asset production pipeline that combines design, research, structure, and surface work, all layered in sequence.
Each project takes its own path. A robot for a sci-fi film won’t follow the same 3D modeling process as a chair designed for a product catalog. Teams at Prolific Studio adjust their 3D modeling workflow to match what’s needed; some models demand detail and realism, while others focus on lightweight performance for real-time use.
What doesn’t change is the foundation: solid planning, clean topology, and steady refinement at every stage of the 3D model creation process.
Step 1: Concept Art and Reference Gathering
Every 3D project begins with a clear visual target. The concept art to 3D asset workflow starts here, the phase that decides what the final piece should look like and what emotion it should carry.
Concept artists sketch and refine the initial look while modelers collect 3D modeling references to guide accuracy. It could be anything: photos, drawings, blueprints, or real-life objects. A character artist might look at anatomy books; someone designing architecture might study building elevations.
These references keep the vision consistent. They’re the checkpoints that make sure no detail goes off track once production starts.
Strong concept art is the anchor of the 3D modeling process. It’s easier to adjust colors on paper than to redo a fully built mesh. At Prolific Studio, the concept stage is treated like quality insurance; it prevents wasted time later.
Step 2: Blocking Out the Model
Once the concept feels right, modelers start blocking. This is the earliest sculpt, rough and unpolished, made from basic shapes. Cubes, spheres, and cylinders stand in for real parts.
The point here isn’t detail but proportion. If a model doesn’t feel balanced at this stage, it never will later. Artists check scale, silhouette, and how the object fits into its environment. For example, a car model should match its driver’s height and interior dimensions from the start.
Fixes are easiest now. That’s why teams at Prolific Studio use blocking as a reality check. If something looks awkward in blockout, it’ll save hours to correct it here rather than after detailing.
Step 3: Building the Base Mesh
Once the blockout looks balanced, artists move to the base mesh, the model’s main structure. This step is where mesh creation and topology come into focus.
Topology simply means how all the polygons are connected. It decides how smooth an animation will look, how cleanly light reacts, and how easy it’ll be to texture later.
Artists rely on quads (four-sided polygons) since they behave predictably in animation. Edges follow muscle flow or the direction of mechanical parts. It’s subtle work, almost mathematical, but it lays the foundation for everything else: sculpting and retopology in 3D, UV mapping, and asset optimization for game engines.
Good topology isn’t flashy, but it’s what makes a model usable and efficient.
Step 4: Low-Poly Modeling
Now comes the balancing act, keeping the model detailed but making it efficient. The low-poly modeling phase trims the excess polygons to ensure smooth performance in real-time settings like games or VR.
Every triangle matters. Artists decide which parts need the most detail, facial expressions, joints, detailed edges, and where it’s safe to simplify. It’s a mix of math and instinct.
The result? A model that still looks high-quality once lighting and textures come in, but doesn’t slow down the engine. For 3D modeling for games, that’s essential. A model that looks great but lags is useless.
At Prolific Studio, artists stick to platform-specific polygon budgets. A console asset can afford more geometry than one made for mobile, but the attention to form stays the same.
Step 5: UV Mapping in 3D Modeling
Once the model’s shape is final, it’s time for UV mapping in 3D modeling. This step flattens the 3D surface into a 2D layout so that textures can wrap around correctly.
A sloppy UV layout causes stretched or broken textures, easy to spot, hard to fix. Clean UVs, on the other hand, make the surface behave perfectly under any texture or light setup.
Artists separate the model into UV islands, flatten them, and pack them carefully to make the most of available texture space. For symmetrical objects, mirrored UVs save time and memory. Asymmetrical designs get custom unwraps.
To double-check alignment, many artists apply checker patterns. At Prolific Studio, this is a mandatory step before texturing begins. Clean UVs mean fewer surprises when materials come into play.
Step 6: Sculpting and Retopology in 3D
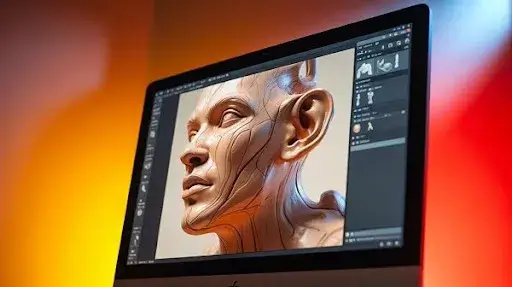
This is where artistry meets technology. Sculpting gives a model character, the tiny imperfections that make it believable. Using tools like ZBrush or Blender, artists sculpt folds, dents, pores, and scratches.
These high-poly sculpts can hit millions of polygons, far too heavy for animation or game engines. So, a simplified mesh is built over it using retopology. The new mesh captures the same shapes but with a fraction of the geometry.
Sculpting shows imagination; retopology shows discipline. Together, they balance creativity and practicality. Models that go through this stage move well, render cleanly, and hold up under any lighting setup.
Step 7: Baking and Texture Mapping
At this stage, the model has both form and structure. What it needs now is surface detail, that’s where baking comes in.
Baking transfers all the tiny sculpted details to the optimized low-poly model through texture maps. Normal maps, height maps, and ambient occlusion all play their part in mimicking real depth and shadow.
This step makes a lightweight model look like a dense one, the core trick behind every realistic 3D asset. Once baking is done, artists move to 3D texturing and material application, defining how each surface reacts to light.
Metal reflects sharply, fabric scatters light softly, and skin sits somewhere in between. These materials transform the model from technical to tangible. By now, it’s ready for its close-up, animation or rendering is just around the corner.
Step 8: Rigging and Skinning
Once a model looks finished, it still feels… empty. That’s where rigging quietly steps in, the invisible stage that gives it a skeleton and a heartbeat. Beneath the surface, artists build a framework of bones and joints that decides how each part bends, stretches, and breathes.
For characters, it’s all about nuance, a raised eyebrow, a small smirk, the shift of a shoulder. Machines move differently, more predictable, but they still need rhythm. Rigging isn’t just math, it’s intuition.
Then comes skinning, the process of attaching that digital body to its bones. This part can be tricky. Too much influence and your model bends like rubber; too little and it freezes up. But when it’s right, it moves naturally, like it’s alive.
At Prolific Studio, this step is treated with patience. Artists test, adjust, and retest until every motion feels effortless. You don’t notice good rigging, you just feel it.
Step 9: Texturing and Material Work
Now comes the fun part, texturing. This is where artists give a model its soul. Smooth metal, cracked leather, soft skin, every texture changes how it feels.
There’s no single formula. Some details are painted by hand, some built through layered maps or math-driven systems. Each layer, color, roughness, reflection, and bump adds a bit more realism. Ironically, it’s the tiny flaws that make things believable.
A fingerprint on glass. A chip on old paint. Dust where it shouldn’t be. These imperfections turn “perfect” renders into something that feels lived-in. Prolific Studio’s artists use PBR methods to test materials under all kinds of lighting, daylight, neon, and candlelight, to make sure they always hold up.
Step 10: Lighting and Rendering
Lighting changes everything. The same model can look peaceful, intense, or cinematic, depending on how the light wraps around it.
Artists experiment endlessly, with soft sunlight, sharp backlight, and dim mood lighting. Once the right tone clicks, rendering takes over. That’s when everything, geometry, materials, and reflections, comes together in one frame.
Rendering isn’t a quick button press. It’s waiting, tweaking, adjusting, sometimes for hours. Each render is a balance between beauty and performance.
At Prolific Studio, this stage is treated like storytelling. Every light, every shadow is intentional. The result isn’t just a 3D image; it’s a mood.
Step 11: Post-Processing and Presentation
Even after rendering, the image isn’t truly done. Post-processing adds that cinematic finish, the subtle tone shifts, soft glows, and contrast tweaks that make everything feel complete.
Maybe the shadows need a touch more depth. Maybe the color feels too cold. A hint of bloom, a bit of grain, small things that change the entire feel.
Presentation plays a role too. The right background or angle can completely alter perception. That’s why Prolific Studio often shares rotating turntables and layered close-ups, not just for show, but to let clients see the craft in every pixel.
Step 12: Cleanup and Optimization
This is the part nobody talks about but everyone relies on. Once the renders are done, the cleanup begins, artists zoom in, inspecting every detail for issues: broken edges, flipped normals, missing textures.
Then optimization starts. Geometry gets cleaned, textures are reduced without losing quality, and tests are run in engines like Unreal or Unity to make sure everything performs smoothly.
At Prolific Studio, no asset leaves the floor until it’s efficient, functional, and ready for real use, whether that’s a film shot, AR demo, or game environment.
What Often Gets Missed in the 3D Workflow
Most people think 3D modeling starts with sculpting, but it doesn’t. It starts with planning, research, and visual direction. Before the first polygon is touched, artists gather references and define how detailed or optimized the final piece needs to be.
After modeling ends, there’s still work ahead. A high-poly version for film, a lighter one for real-time, both built from the same source. Prolific Studio plans that from the start, so no one scrambles later.
Common 3D Modeling Mistakes (and How to Dodge Them)
Even skilled artists trip over familiar issues:
- Too many polygons: more weight, slower workflow.
- Bad topology: warped animations and odd shading.
- Poor UV maps: textures stretch and lose realism.
- Flat materials: the world isn’t perfect, and neither should renders be.
- Disorganized files: creative chaos turns into production delays.
The fix? Consistency. Proper naming, version control, and a clean structure, boring, yes, but priceless.
Why Feedback Is Everything
No matter how talented the artist, after staring at the same model for days, small errors slip by. That’s where feedback changes everything.
Sometimes a single note, “the metal feels too polished” or “the lighting looks cold”, shifts the direction entirely.
At Prolific Studio, feedback isn’t a final checkpoint. It’s part of the workflow. Artists share progress early, refine together, and adjust in real-time. That rhythm keeps ideas fresh and results sharp.
Frequently Asked Questions
What are the main stages of 3D modeling?
Concept art, modeling, cleanup, UV mapping, texturing, rigging, lighting, and rendering, each stage builds on the last.
How long does the process take?
It depends on the project’s scale. Small props may take days; complex environments or characters can stretch over weeks.
Which tools do professionals use?
Usually Blender, Maya, or 3ds Max for modeling; ZBrush for sculpting; Substance Painter for texturing; V-Ray or Unreal for rendering.
Why is topology so important?
Because good geometry keeps models smooth in animation and helps light behave correctly. Bad topology causes messy results.
Why choose Prolific Studio?
Experience and structure. Their team avoids the usual pitfalls, builds assets ready for production, and delivers quality that performs, not just looks good.
Final Words
3D modeling isn’t just a technical craft; it’s the art of creating something that feels real enough to believe. Every step, from sketch to final render, is part of that illusion.
A great model doesn’t just look correct; it feels right. It reacts, moves, and fits naturally into its world. That’s the line between hobby work and professional-grade art.
At Prolific Studio, every choice, from light placement to texture detail, is made for one purpose: to make the final result not just accurate, but alive.
Related Articles:

