

AI animation is reshaping how studios produce explainer videos, product demos, and brand stories. What used to take days or even weeks can now be compressed into a matter of hours when the right workflow is used.
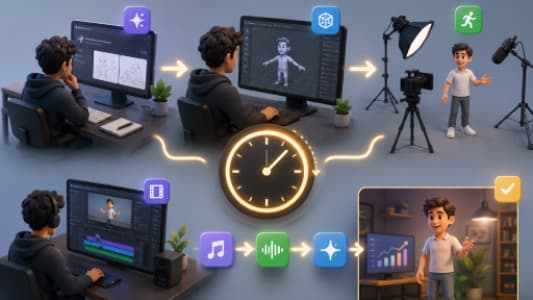
In this guide, we’ll break down a real-world inspired production pipeline showing how a high-quality 3D explainer video can be created in roughly 3.5 hours using AI tools like ChatGPT-4o, Hedra Character-3, and AI video generators—then refined into a polished final edit.
This process is especially relevant for modern studios like Prolific Studio, where speed, iteration, and creativity now go hand in hand.
The New Era of AI Animation Production
Traditional 3D animation workflows involve:
- Scriptwriting (1–2 days)
- Storyboarding (2–5 days)
- Modeling and rigging (3–10 days)
- Animation (several days to weeks)
- Rendering and post-production (1–3 days)
AI completely compresses this pipeline by automating or accelerating the early and mid-production stages.
Instead of starting with blank timelines and complex rigs, creators now start with:
- A fully written script in minutes
- AI-generated characters and concepts
- Instant scene previews
- Rapid animation generation
This shift allows studios like Prolific Studio to focus more on storytelling, creative direction, and client refinement rather than manual labor.
Step 1: Concept Development with AI
Every great explainer video starts with a clear idea.
Using ChatGPT-4o, you can generate:
- Video concepts
- Brand messaging
- Character personalities
- Tone of voice (fun, corporate, cinematic, etc.)
For example, a prompt like:
“Create a 90-second 3D explainer video concept for a fictional AI app with a fun mascot character and a modern tech vibe.”
Can instantly return:
- A storyline
- Scene breakdown
- Character description
- Brand positioning
Why this matters
In traditional workflows, concept development can take days of brainstorming sessions. With AI, it becomes a 10–15 minute step.
At this stage, studios like Prolific Studio often refine AI output into production-ready narratives that align with client branding.
Step 2: Writing the Script in a Production Format
Once the concept is ready, the next step is scripting.
A powerful AI workflow is to request:
“Write the script in a two-column format: VO (Voiceover) on the left and Visuals on the right.”
This structure is extremely useful because it directly translates into animation planning.
Example structure:
| Voiceover | Visual |
|---|---|
| Welcome to the future of AI apps | Futuristic UI animation intro |
| Meet Rex, your AI assistant | Character reveal animation |
Benefits of AI scripting:
- Instant structure
- Easy to animate
- Clear timing cues
- Reduced pre-production confusion
This is the foundation used in modern pipelines at Prolific Studio, especially when creating fast-turnaround 2D and 3D explainer content.
Step 3: Character Design Using AI Tools
Character creation is often the most time-consuming part of 3D animation but AI changes that completely.
With tools like ChatGPT-4o image generation or similar AI design tools, you can quickly generate:
- Mascot characters
- Human presenters
- Stylized 3D figures
- Brand mascots
Example output:
A tech mascot like “Rex” might include:
- Friendly robotic personality
- Bright color palette
- Product-integrated props
- Slightly exaggerated facial expressions
Key insight
AI will sometimes produce inconsistent details (like props disappearing or style mismatches). That’s normal.
Professional studios like Prolific Studio solve this by:
- Locking character design sheets early
- Reusing consistent prompts
- Cleaning assets in post-production
Step 4: Scene Generation and Storyboarding
Instead of manually drawing storyboards, AI tools can generate:
- Key frames
- Scene compositions
- Background environments
- Camera angle suggestions
For example, you can request:
“Generate 5 cinematic scenes showing a mascot interacting with a futuristic mobile app in a desert tech environment.”
This produces near-final visual direction for animation.
Why this matters
This step reduces storyboard time from days to minutes.
However, human supervision is still essential to ensure:
- Visual continuity
- Brand alignment
- Logical storytelling
This hybrid workflow is now commonly used in production pipelines at Prolific Studio.
Step 5: AI Animation Generation (Hedra + Kling Workflow)
Once visuals are ready, the next step is animation.
Popular tools in this workflow include:
- Hedra Character-3 (character animation system)
- Kling AI (image-to-video animation engine)
What happens here:
- Upload character design
- Provide motion prompt
- Generate animated sequences
- Iterate until movement feels natural
Example prompts:
- “Character walks and presents app interface confidently”
- “Floating objects orbit around mascot in slow motion”
- “Cinematic reveal with dynamic lighting”
Limitations
AI animation is powerful but still imperfect:
- Logos may distort
- Hands or props may glitch
- Motion may feel slightly unnatural
Professional studios like Prolific Studio handle this by:
- Re-rendering problematic shots
- Separating product elements for cleanup
- Adding motion graphics overlays in post
Step 6: Enhancing with 2D Motion Graphics
Even in a 3D workflow, 2D animation plays a critical role.
At this stage, UI elements such as:
- App screens
- Text callouts
- Icons
- Transitions
are added using 2D motion design tools.
This is where a strong foundation in 2D animation becomes valuable.
You can explore this further through the 2D Animation Services offered by Prolific Studio.
Why 2D still matters in AI workflows
Even in 3D-heavy projects, 2D animation is essential for:
- UX/UI clarity
- Explainer readability
- Brand consistency
- Lower cognitive load for viewers
A hybrid 2D + 3D approach is now the industry standard.
Step 7: Post-Production and Editing
Once all assets are generated, everything is assembled in an editing suite like:
- CapCut
- Adobe Premiere Pro
- After Effects
Post-production tasks include:
- Scene trimming
- Color correction
- Sound design
- Music syncing
- Transition effects
- Branding overlays
This is where the raw AI output becomes a polished commercial video.
Even though AI reduces production time dramatically, editing remains the most important quality-control stage.
Step 8: Audio, Voiceover, and Final Polish
A strong explainer video is not just visuals—it’s storytelling.
AI-generated or human-recorded voiceovers are added along with:
- Sound effects
- Background music
- UI interaction sounds
This creates emotional engagement and improves viewer retention.
Studios like Prolific Studio often finalize this stage with professional audio mixing to ensure broadcast-quality output.
Total Production Time Breakdown (AI Workflow)
Here’s what a compressed AI animation pipeline looks like:
- Concept & script: 20–30 minutes
- Character design: 30–45 minutes
- Scene generation: 30–60 minutes
- AI animation: 60–90 minutes
- Editing & post-production: 60–90 minutes
Total: ~3.5 to 5 hours
What once took a full production team weeks can now be prototyped in half a day.
What This Means for the Future of Animation
AI does not replace animation studios it changes how they work.
The future belongs to hybrid studios that combine:
- Human creativity
- AI speed and automation
- Professional storytelling
- Advanced post-production polish
Companies like Prolific Studio are already adapting this model to deliver faster, more scalable, and highly creative video content for brands worldwide.
Final Thoughts
Creating a 3D explainer video in 3.5 hours is no longer science fiction—it’s a practical workflow when using modern AI tools correctly.
The key is not just the tools, but the structure:
- Start with AI-driven concepting
- Build a structured script
- Generate characters and scenes
- Animate using AI video engines
- Refine with 2D motion graphics
- Polish in post-production
And most importantly—treat AI as a creative assistant, not a replacement.
If you want to explore professional-quality animation services or hybrid AI + studio workflows, visit Prolific Studio or check out their dedicated animation offerings.


