

A character is a promise. In the first few seconds, players decide if they trust that promise, remember it, or skip it.
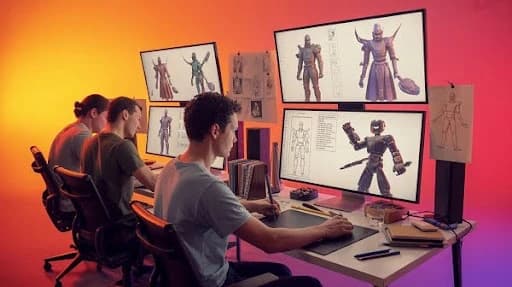
This guide is built for speed and quality, the combo that keeps a production moving. At Prolific Studio, this is how we keep character work sharp from the first sketch to the final in-game asset. If you are searching for how to create a video game character, start here. These tips follow the same flow most studios use, from idea to in-game ready.
1. Start With The Job, Not The Jacket
Before you sketch hair, answer one question: What does this character do in the game?
A healer reads differently from a brawler. A stealth scout reads differently from a loud tank. Role drives posture, silhouette, gear, and animation style.
Write a one-line brief. Add three keywords: mood, function, and contrast. Example: “Cheerful mechanic, fixes drones, tiny but stubborn.”
Now add one rule you will not break, like “always carries a heavy tool,” or “never shows their eyes.”
2. Set A Time Box For References
References matter. Endless scrolling does not. Give yourself 20 minutes to gather: one face, one body type, one outfit set, two materials, and one colour palette. Save them on a single board. Name the board after the role, not “cool pics.” Future you will thank you. If you need extra fuel, grab one reference that feels wrong on purpose. It can spark a better twist.
3. Pick Your Style Lane Early
Realistic, semi-stylised, cartoony. Choose one lane and commit. This keeps your shapes, textures, and lighting honest. It also stops you from mixing “movie proportions” with “toy proportions.”
If you are working with a 3D video animation studio, style lock is the first thing they will ask for, because every downstream choice depends on it. Write a mini style note: line weight, material feel, and how clean the shapes should look.
4. Do The Silhouette Test First
Make a quick black shape of the character. No details, no colours. If the silhouette is boring, the final model will not save it.
Try three poses: neutral, action, and idle. If the character reads in all three, you are on the right track. Keep the signature readable from far away: hat, backpack, cape, big hair, odd weapon, or a unique stance.
5. Use Shape Language On Purpose
Circles feel friendly. Squares feel steady. Triangles feel sharp. Pick a dominant shape and keep it consistent across head, torso, and gear.
This is where hand-drawn animation principles still help. Even in 3D, strong shape language gives clarity and personality. Mix shapes for contrast, then keep one shape as the “leader” so the design stays clean.
6. Think In Big, Medium, Small
Detail is not “more stuff.” Detail is rhythm. Start with one big statement shape, add a few medium shapes, then sprinkle small accents. Keep the accents where players look: face, hands, chest icon, signature weapon.
If every part has the same noise level, nothing feels special. A quick check: squint at the design. You should still see a clear hierarchy.
7. Design For The Game Camera, Not Your Close-Up
Most characters live at a distance. Zoom out early. Check your model at the same scale and angle the player sees most. If the face turns into a dot, your eyebrows and freckles are not doing their job.
Use readable markers: a bold hair shape, a clear collar, a distinct shoulder line, or a bright emblem. Treat tiny details as a bonus, not the foundation.
8. Block Out In 3D Fast
Do not fall in love with the first sketch. Get a rough blockout in 3D as soon as you can. A simple base mesh with correct proportions beats a perfect drawing that cannot move.
Work in stages:
- Primitive shapes for the body and gear
- A clean base mesh pass
- A single “hero” detail passes on the focal area (often the head)
Keep the blockout ugly on purpose. Ugly keeps you flexible.
9. Plan Your Budget Before You Go Fancy
Your character has three budgets: polygons, textures, and time. Set targets early so you do not rebuild later. Ask these questions:
- How close does the camera get?
- How many characters appear at once?
- Is this for mobile, console, or PC?
This also ties into the 3D animation cost. More complexity means more rigging time, more testing, more fixes. Build smart, not heavy. If the character is background, spend the budget on silhouette and colour, not micro detail.
10. Make The Model Modular When It Helps
Modularity saves time and adds options. Think separate boots, gloves, belts, pouches, shoulder pieces, and hair variants. You can swap parts, create skins, and reuse assets across characters.
Keep the seams hidden in natural breaks, like under belts or inside armour edges. Also, keep a “plain” version of the character. It helps with clean LODs and quick fixes.
11. Keep Topology Clean Where It Bends
If it must move, it needs good loops. Focus on shoulders, elbows, hips, knees, neck, and face. Keep edge flow simple. Avoid tiny triangles in bend zones.
A quick trick: pose-test early. Rotate arms up, bend knees, and open the mouth. Fix issues now, not after texturing. If you plan to cloth sim later, still start with solid deformation. Games love predictable rigs.
12. Texture With A Clear Goal
Textures are not decoration. They explain the material and age. Pick a small set of materials that match the character’s story: worn leather, cheap plastic, brushed metal, dirty fabric.
Keep roughness readable. Roughness does most of the heavy lifting for realism and style. Limit your “special” effects. One great sticker, one stitched patch, one scar. Too many, and the design turns noisy.
13. Check Values In Black And White
Color is loud. Values do the real work. Flip your render to grayscale during reviews. If the face blends into the jacket, adjust values before you chase new colours.
A fast fix is to separate face and torso values. Keep the face slightly brighter or cleaner. This helps players read emotion during gameplay, even on small screens.
14. Give The Character A Simple Pose For Approval
A stiff T-pose sells nothing. Pose the character in a calm, confident stance that matches the role. Hands matter. So does the tilt of the head.
Keep it simple. The point is approval, not a final animation. Once the pose looks right, save it as a quick “compare” shot for future changes.
15. Build A File Habit Like A Pro
Messy files slow teams down. Name your objects. Group them. Keep versions. Save a “gold” file that stays stable, then work in copies.
This matters even more when your character will pass through a video animation agency pipeline with multiple hands touching the asset. Clean files prevent expensive confusion. Also, write a short README in the folder. List scale, texture sizes, and export settings.
16. Rig For The Actions, Not For Ego
Start with a short list of moves your character must do. Run, jump, climb, aim, reload, talk, emote, attack, take hits.
Build controls around those needs. Skip the extra complexity that no one uses. A clean rig that animates fast beats a fancy rig that breaks.
17. Use A “Stress Test” Pose Early
Before you polish weights, push the rig into extreme poses: Arms straight up, deep crouch, full twist, wide stride, strong facial expression.
Fix the ugly spots now. This one step saves days later. Most rig pain shows up in the shoulders, hips, wrists, and ankles.
18. Weight Painting Works Best In Layers
Do not chase perfection in one pass. Do three passes:
- Pass 1: broad, smooth weights so the body bends clean
- Pass 2: tighten elbows, knees, and shoulders
- Pass 3: details like fingers, face, and cloth edges
Mirror weights when you can, then hand-fix the character’s “dominant” side if needed.
19. Keep Deformations Simple Around Clothing
Games love predictable deformations. If your jacket has five straps, three buckles, and loose sleeves, plan how each part moves.
- Some items should be part of the body skin.
- Some should be rigid props that follow bones.
- Some should use simple Sims only if the game supports it.
Make choices early so you do not rebuild the outfit twice.
20. Face Rig: Pick The Method That Fits The Camera
If players see the face up close, build for expression. If the camera stays far, keep it lighter.
Two common options:
- Blendshapes for clean expressions
- Bone-based face controls for lighter files
Keep the mouth and brows readable. Players read emotion there first.
21. Make A Tiny Animation Library For Testing
Animation exposes design issues fast. Create short loops: idle, walk, run, jump, and one signature action.
This is also where “cool” turns into “clear.” If the pose reads messy in motion, simplify the silhouette or gear.
When teams come to us for game animation services, we start with this kind of test pack to catch issues early and keep production smooth.
22. Build Motion With Clear Priorities
Players notice three things first: head direction, hand intent, and weight shift.
Make those clean before adding a tiny flourish. A character can look expensive with simple motion if the weight feels right.
Also, watch the hands. Hands sell personality.
23. Check The Character In A Real-Time Engine View
Do not wait until the end to see it in the engine. Get a quick preview of your target setup early.
Lighting and materials look different in real-time. Normal maps can feel too strong. Roughness can look flat. Colours can shift.
A fast engine check stops surprises later.
24. Optimise Without Killing The Look
Optimisation is not “make it ugly.” It is “spend detail where it matters.” Focus detail on the face, hands, and silhouette zones.
Common wins:
- reduce hidden faces under clothes
- simplify straps and tiny buckles
- merge parts that never need to move separately
Keep the character light enough to run smoothly in gameplay.
25. Create LODs Like You Mean It
Levels of Detail are not optional for most games. Make at least two reduced versions that still hold the silhouette.
Do not rely only on auto tools. They can ruin edges and shapes. Manual cleanup keeps the character looking intentional.
26. Keep Texture Resolution Practical
Use the smallest texture size that still looks sharp in the game camera. Big textures on small screen characters waste memory.
Use texture packing where it fits your pipeline. One texture set that is organised beats five random files with unclear naming.
27. Save Your Work With Clean Exports And Naming
Export errors come from tiny mismatches: scale, axes, bone names, and file settings. Pick a consistent ruleset and stick to it.
Good habits:
- consistent unit scale
- clear bone names
- frozen transforms before export
- one “final export” folder, not ten versions scattered around
This is boring work. It is also the work that keeps teams sane.
28. Present The Character Like A Product, Not A Sketch
Presentation is part of production. Give your team clear visuals that answer questions fast.
Include:
- front, side, back views
- one hero pose
- a neutral pose
- close-ups of the face and key materials
- scale reference next to a common object or human base
If a studio is building game trailer services around your character, these views help match the look across cinematic shots and marketing renders.
29. Track Changes Like A Professional
Use simple versioning. Write a short change log: “v06: reduced shoulder pads, adjusted brow shape, fixed knee bend.”
This keeps feedback clean. It also protects you from going in circles. Teams move faster when decisions are documented.
30. Stay Aware Of What Players Expect Right Now
Styles shift. Tastes shift. Platforms shift. You do not need to chase every new look, but you should know what players are used to seeing.
A quick monthly check on top animation trends helps you spot what feels dated and what feels fresh. Then you choose on purpose, not by accident.
Frequently Asked Questions
What software do I need to make a game character?
You need a modelling tool, a texturing tool, and a way to test in a game engine. Many creators use Blender for modelling, a texture app for materials, then Unity or Unreal Engine for testing.
How many polygons should a game character have?
It depends on platform and camera distance. Mobile games use far fewer polygons than console or PC titles. Start from your target platform and test performance early.
What is the best way to make a character feel unique?
Give the character one clear “signature” element and support it with shape language. It can be a silhouette feature, a prop, a colour rule, or a distinct posture.
Do I need to rig the character before texturing?
Rigging first helps you catch deformation issues early. Many teams do modelling, basic rig and pose tests, then texture and final polish.
How do I make sure my character works in Unity or Unreal Engine?
Use correct scale, clean bone naming, and a tested export setup. Import early, test animations, and confirm materials look right in real-time lighting.
Should I make character skins and variants from the start?
Yes, if the game needs them. Build modular parts and clean texture layouts so variants do not force a full rebuild later.
What are the biggest mistakes beginners make?
Over-detailing too early, skipping motion tests, messy files, and no engine checks until the end. Fixing those four habits upgrades your work fast.
Final Words
A great character is not just a cool design. It is a production asset that rigs clean, animates well, runs smooth, and still looks sharp in the game camera. If you want Prolific Studio to help take your character from concept to game-ready production, we can step in at any point and build it to studio-grade standards, the same caliber expected in partnerships with top-tier studios.
Related Articles:


