

Creating a memorable 2D game character is one of the most exciting parts of developing a game. A well-designed character can become the visual identity of an entire gaming experience, helping players connect emotionally with the story, understand the gameplay, and remember the game long after they have finished playing it.
However, creating a 2D game character is about much more than drawing a head, body, arms, and legs. To make a character move naturally on screen, artists and animators need to carefully prepare the artwork, organize individual body components, build a digital skeleton, connect the artwork to that skeleton, and finally animate the character using keyframes.
At Prolific Studio, we understand that successful 2D character animation combines creativity, technical precision, storytelling, and a strong understanding of movement. Whether you are developing a mobile game, indie title, educational experience, promotional game, or interactive project, professionally created 2D characters can bring your ideas to life.
In this guide, we will explore how to create and animate a 2D game character, from the initial artwork and character assembly to rigging, bone structures, keyframes, and final animation.
What Is a 2D Game Character?
A 2D game character is a visual character designed to exist within a two-dimensional environment. Unlike traditional static illustrations, game characters are usually created with movement and interaction in mind.
A character may need to:
- Walk and run
- Jump and land
- Attack or defend
- Pick up objects
- Talk and express emotions
- Turn around
- Interact with other characters
- Perform special actions
- React to events in the game
For this reason, a 2D game character is often divided into multiple visual components. Instead of creating one single flat image, artists may separate the head, torso, arms, hands, legs, feet, hair, clothing, weapons, and accessories.
This structure allows animators to manipulate individual components and create more flexible movement.
The process typically involves several stages, including character design, artwork preparation, rigging, skeletal setup, animation, rendering, and export.
Step 1: Plan Your Character Before You Start
Before creating artwork, it is important to understand what your character needs to do.
Start by considering the role of the character in your game. Is the character a hero, villain, sidekick, enemy, or non-playable character? What type of movements will be required?
For example, a platform game character may need walking, running, jumping, crouching, and attacking animations. A strategy game character may require simpler movements, while a story-driven game may need detailed facial expressions and emotional gestures.
Create a list of the animations you expect to produce. This will help you design the character with animation in mind from the beginning.
You should also consider:
- The game’s visual style
- The target audience
- Character proportions
- Color palette
- Clothing and accessories
- Personality
- Required movements
- Camera perspective
- Intended platform
Planning these details early can save significant time during the animation process.
Step 2: Create the Individual Character Components
Once the character concept is finalized, the next step is to prepare the artwork.
Instead of creating the entire character as a single image, divide it into separate components. Depending on the character, these may include:
- Head
- Hair
- Neck
- Torso
- Upper arms
- Lower arms
- Hands
- Upper legs
- Lower legs
- Feet
- Clothing
- Weapons
- Shields
- Accessories
Each component should be created carefully so that it can be manipulated independently during animation.
For example, if you want your character to wave, the upper arm, lower arm, and hand should be separate elements. If the character is holding a sword, the sword may also need to exist as a separate image layer.
The same principle applies to facial animation. If the character needs to blink, smile, talk, or show different emotions, additional layers or facial elements may be required.
At Prolific Studio, our 2D animation workflow focuses on creating artwork that is not only visually appealing but also technically prepared for smooth animation.
Step 3: Assemble the Character
After preparing the individual components, you can begin assembling the character.
Place each body part in its correct position to create the complete character. At this stage, you can adjust the position, size, rotation, and scale of individual elements.
Pay close attention to how the parts connect.
For example, the upper arm should connect naturally to the shoulder, while the lower arm should connect to the elbow. Similarly, the upper leg should connect correctly to the hip, and the lower leg should align with the knee.
Layer organization is also important.
Some components need to appear behind others. For example, a character’s hair may need to appear behind the head, while a hand holding an object may need to appear in front of the torso.
A clear layer hierarchy makes the animation process much easier later.
Before moving forward, review the character from multiple angles and check whether all body components are aligned correctly.
Step 4: Build a Digital Skeleton
Once the character artwork is assembled, the next stage is rigging.
Rigging involves creating a digital skeleton that controls the character’s movement.
The skeleton typically consists of interconnected bones. Each bone represents a part of the character’s structure and helps determine how that part moves.
A basic character skeleton might include:
- Root or pelvis bone
- Spine
- Neck
- Head
- Left upper arm
- Left lower arm
- Left hand
- Right upper arm
- Right lower arm
- Right hand
- Left upper leg
- Left lower leg
- Left foot
- Right upper leg
- Right lower leg
- Right foot
The exact structure depends on the character and the animation requirements.
For simple characters, you may only need a few bones. More detailed characters may require additional bones for fingers, facial elements, clothing, tails, wings, or other accessories.
The goal is to create a skeleton that gives the animator enough control without making the rig unnecessarily complicated.
Step 5: Name and Organize Your Bones
As the number of bones increases, organization becomes essential.
Give each bone a clear and descriptive name. Instead of using generic names, use labels that immediately identify their purpose.
For example:
- Left_Upper_Arm
- Left_Lower_Arm
- Right_Upper_Arm
- Right_Lower_Arm
- Left_Thigh
- Right_Thigh
Clear naming makes it easier to locate specific elements during animation.
You can also organize the skeleton using a logical hierarchy. The character’s main root should control the overall body, while smaller bones should be connected to their corresponding parent bones.
Good organization becomes especially important when working on complex game characters or large animation projects.
Step 6: Link the Artwork to the Skeleton
After creating the bones, you need to connect the character artwork to the appropriate parts of the skeleton.
This is the core of the rigging process.
For example, the upper-arm image should be associated with the upper-arm bone. The lower-arm image should follow the lower-arm bone, while the hand should follow the hand bone.
This connection allows the animator to move the skeleton while the artwork follows the movement.
The quality of this step directly affects the final animation.
If the artwork is connected incorrectly, the character may bend unnaturally or body parts may move independently when they should remain connected.
A carefully designed rig ensures that movement flows naturally through the character.
Step 7: Create Connections Between Bones
Simply connecting artwork to bones is not enough. The bones themselves must also be organized into a hierarchy.
Think of the skeleton as a chain.
The upper arm controls the lower arm. The lower arm controls the hand. Similarly, the thigh controls the lower leg, and the lower leg controls the foot.
This hierarchy allows movement to travel naturally through the character.
For example, when you rotate the upper arm, the lower arm and hand can follow its movement. When the thigh moves, the lower leg and foot can move with it.
The same principle applies to the upper body.
The torso may control the neck, the neck controls the head, and additional bones can control facial or accessory elements.
A properly structured bone hierarchy makes animation faster, more flexible, and more realistic.
Step 8: Test the Character Rig
Before starting the final animation, test your rig.
Move each major bone individually and observe how the artwork responds.
Check the following:
- Does the head move naturally?
- Does the neck rotate correctly?
- Do the arms bend at the elbows?
- Do the hands follow the arms?
- Do the legs bend correctly at the knees?
- Do the feet stay connected?
- Do accessories move with the correct body parts?
- Are there any unwanted gaps between components?
Testing at this stage is extremely important.
Fixing a rigging problem after completing a long animation can be time-consuming. It is much easier to identify and correct problems before animation production begins.
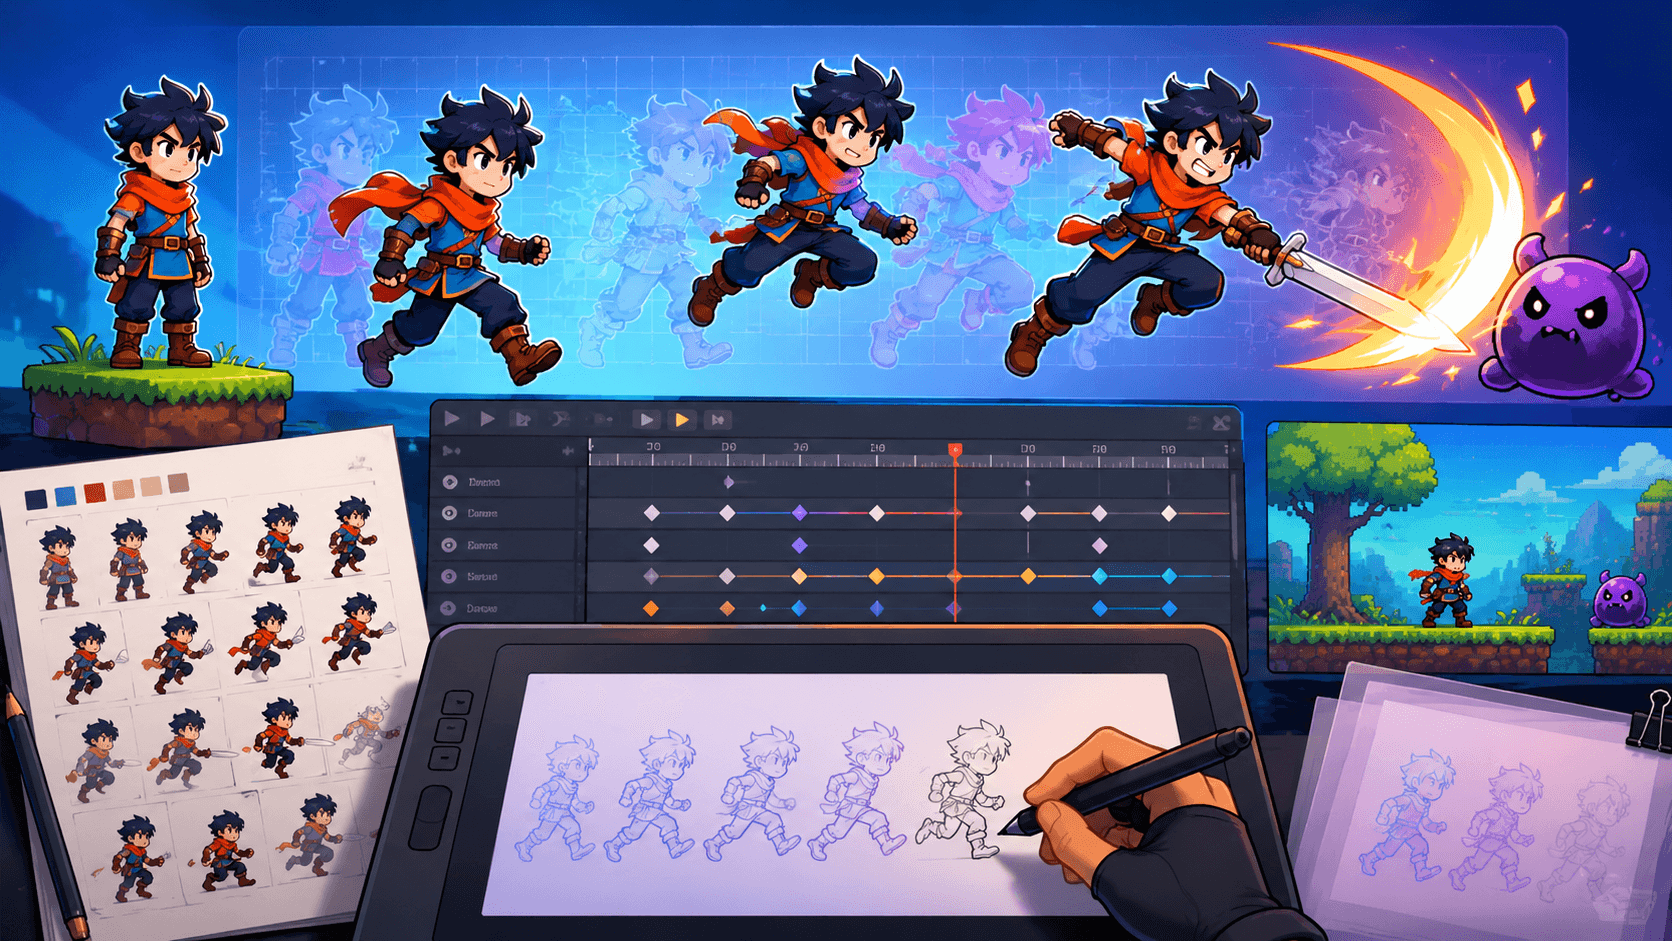
Step 9: Start Animating Your 2D Character
Once the character is fully rigged, you can begin animation.
The animation timeline is where you control the character’s movement over time.
Instead of manually redrawing the entire character for every frame, you can create keyframes that define important positions.
A keyframe represents a specific point in an animation where a change occurs.
For example, imagine creating a simple waving animation.
At frame 0, the character’s arm is down.
At frame 15, the arm moves upward.
At frame 30, the arm reaches a different position.
The animation system generates the movement between these key poses, creating a smooth transition.
This approach makes skeletal animation efficient and flexible.
Step 10: Understand Keyframes and In-Between Movement
Keyframes are fundamental to 2D animation.
They establish important moments in the movement, while the frames between them create the transition.
For example, if a character jumps, you might create keyframes for:
- Standing position
- Preparing to jump
- Leaving the ground
- Reaching the highest point
- Beginning to fall
- Landing
These key poses define the overall action.
The frames between the keyframes create the illusion of continuous movement.
However, professional animation is not simply about placing two keyframes and letting software handle everything automatically. Animators often adjust timing, spacing, easing, and poses to make the movement feel natural.
This is where artistic judgment becomes extremely important.
Step 11: Animate Position, Rotation, and Scale
A 2D character can be animated in several ways.
Position
Position animation changes where an element is located.
You might move a character from one side of the screen to another or move an arm from one position to another.
Rotation
Rotation changes the angle of an element.
This is particularly useful for:
- Arms
- Legs
- Hands
- Heads
- Weapons
- Objects
- Body movements
Scale
Scale changes the size of an element.
Although scaling is less commonly used for realistic body movement, it can create useful effects such as squash and stretch.
Squash and stretch can make a character feel more dynamic, especially during jumping, landing, running, or impact moments.
Step 12: Adjust Animation Timing
Timing can completely change how an animation feels.
A movement performed over a long period feels slow and gentle. The same movement performed over a shorter period feels fast and energetic.
For example, if a character raises a shield over 45 frames, the action may appear slow and deliberate. If you move the keyframes closer together, the same action becomes faster.
This is why timing is one of the most important elements of animation.
When creating game animations, consider the character’s personality and the action being performed.
A powerful warrior may have strong, fast movements. A relaxed character may move more slowly. A cartoon character may use exaggerated timing for comedic effect.
Step 13: Add Secondary Movement
Once the primary movement is working, you can add secondary animation.
Secondary movement makes characters feel more alive.
For example, when a character runs:
- Hair may bounce
- Clothing may move
- Accessories may swing
- Arms may react to body movement
- The head may move slightly
- The torso may shift with each step
These small details can dramatically improve the quality of the animation.
Secondary motion is especially useful in game characters because it adds personality without requiring completely new character designs.
Step 14: Create Smooth and Natural Motion
Professional animation requires more than simply moving objects between keyframes.
The movement should feel intentional.
Consider how real objects accelerate and decelerate. Most actions do not start and stop at exactly the same speed.
For example, when a character raises an arm, the movement may begin slowly, accelerate, and then slow down as the hand reaches its final position.
Using appropriate easing can create this effect.
You can also use exaggerated motion when creating stylized or cartoon characters.
The right approach depends on the game’s art direction and the personality of the character.
Step 15: Preview and Refine the Animation
After creating your animation, preview it repeatedly.
Look for:
- Jerky movement
- Unnatural rotations
- Incorrect timing
- Sudden changes in speed
- Misaligned body parts
- Layering problems
- Unwanted gaps
- Excessive movement
It is normal to make several adjustments before the animation feels right.
Move keyframes, adjust timing, change poses, and refine the movement until the character behaves naturally.
Animation is an iterative process. Even experienced animators often review and refine their work multiple times.
Step 16: Hide the Skeleton for Final Preview
During production, the character’s skeleton is visible and useful for making adjustments.
However, when reviewing the final animation, you should preview the character without the visible rig.
Hiding the skeleton allows you to see the animation as the audience will experience it.
This can reveal issues that may not be obvious while working with the rig.
You can also temporarily hide artwork layers when troubleshooting specific parts of the character.
For example, if the arm movement looks incorrect, hiding other body parts can help you focus on the arm and identify the problem.
Step 17: Export Your Character Animation
Once the animation is complete, the final step is exporting the project.
Depending on the requirements of your game or project, you may need different output formats.
The final animation may be prepared for:
- Mobile games
- PC games
- Web games
- Interactive applications
- Marketing videos
- Social media content
- Presentations
- Educational experiences
The technical requirements will depend on where the animation will be used.
It is important to consider resolution, frame rate, file size, transparency, and compatibility with the target platform.
Professional animation studios can also help optimize animations for specific platforms and production pipelines.
Why Professional 2D Character Animation Matters
A well-designed 2D character can become one of the strongest assets in a game.
Characters help communicate personality, emotion, and story. They can guide players through a game world and make the overall experience more engaging.
However, poor animation can have the opposite effect.
Jerky movement, unnatural poses, incorrect timing, and poorly connected body parts can make even a beautifully designed character feel unprofessional.
That is why character design and animation should be approached as a complete process.
At Prolific Studio, we combine creative design with animation expertise to develop engaging 2D visuals for different types of projects. Our 2D animation services can help businesses, game developers, brands, and creative teams transform concepts into polished animated experiences.
From character design and rigging to movement, storytelling, and final production, every stage contributes to the quality of the finished result.
Final Thoughts
Creating a 2D game character involves much more than drawing an attractive character.
The artwork must be structured for animation. Body components need to be separated and organized. A digital skeleton must be created and connected to the artwork. Bones need to be arranged into a logical hierarchy, and the rig must be carefully tested before animation begins.
Once the rig is ready, keyframes can be used to create movement, while timing, easing, secondary motion, and careful refinement help turn basic movement into professional animation.
Whether you are building a new game character from scratch or looking to improve an existing character, a well-planned production process can make a significant difference.
With the right combination of creative character design, technical rigging, and professional animation, your 2D characters can move beyond static artwork and become memorable parts of your game world.
At Prolific Studio, we believe great animation is about more than movement. It is about creating characters that communicate, connect, and contribute to an unforgettable visual experience.